Water pressure inside your home’s plumbing system is surprisingly powerful and unforgiving during repairs. You cannot successfully solder a copper joint or glue a PVC fitting if water is still dripping through the line. Even a small amount of residual water can ruin a weld or prevent adhesives from bonding correctly. Learning how to drain pipes for repair is the single most important step before you pick up a wrench or a torch.
Most homeowners assume that simply turning off the main valve is enough to start working. This misconception often leads to flooded bathrooms and panicked calls to emergency plumbers. Gravity and air pressure trap water in the low points of your system, waiting to surge out as soon as you cut into a pipe. You must follow a specific sequence to remove this water completely and safely.
The process requires more than just opening a few faucets randomly throughout the house. You need to understand how your plumbing system breathes and flows to evacuate the lines effectively. This guide outlines the professional method for draining your plumbing system to prepare for maintenance or repairs.
Locating and Closing the Main Water Shut-Off Valve
Every successful plumbing repair begins with the total isolation of the water supply entering your property. You need to find the main shut-off valve before you can do anything else. This valve is typically located where the main water line enters your home, often in a basement, crawlspace, or utility closet.
In warmer climates, you might find this valve outside the house near the street or in a dedicated meter box. It will usually be a wheel-handle gate valve or a lever-handle ball valve. Turn the wheel handle clockwise until it stops, or turn the lever so it sits perpendicular to the pipe.
Test the valve to make sure it actually cuts off the flow of water completely. Old gate valves are notorious for failing to close fully, allowing a steady trickle to pass through. If the main valve fails, you cannot proceed with draining the pipes until that valve is replaced or repaired.
Relieving Pressure and Breaking the Vacuum
Turning off the water does not remove the water already sitting in your pipes. The system remains full, much like a straw filled with liquid when you hold your finger over the top. You must introduce air into the system to break the vacuum and allow gravity to do its work.
Start by opening the faucets on the highest floor of your home to let air enter the plumbing lines. This action releases the vacuum seal that holds water inside the vertical pipe. Without this step, water will leak out slowly or remain trapped in the pipes until you cut them.
Move to the lowest point in the house, such as a basement laundry tub or a first-floor sink, and open those faucets. The water will rush out of these lower fixtures as the air from above pushes it down. This “high-to-low” method is the industry standard for clearing lines quickly and effectively.
Key Takeaways:
- Always start by shutting off the main water valve completely.
- Open the highest faucets first to break the vacuum seal.
- Open the lowest faucets last to let gravity drain the water.
Step-by-Step Guide to Draining Your Pipes
Executing the draining process requires a logical order of operations to prevent damage to your appliances. Skipping steps here can lead to burned-out heating elements or lingering water pockets.
This step-by-step process is especially helpful when dealing with a clogged drain in West Chester, PA, where trapped water can complicate repairs if the system isn’t fully drained first. Follow this procedure to clear your plumbing system safely and effectively.
How to Drain Pipes for Repair
Protect the Water Heater
Turn off the power source to your water heater immediately before draining any water. Switch the breaker off for electric units or turn the gas dial to “Pilot” or “Off” for gas units.
Tip: Heating elements in electric tanks will burn out instantly if they turn on while the tank is empty.
Shut Off the Main Valve
Close the main water shut-off valve to stop new water from entering the building. Verify the flow has stopped by checking a faucet near the valve.
Open All Faucets and Fixtures
Go to the top floor and open all sink, tub, and shower faucets to let air into the lines. Then move downward to the lowest floor and open those faucets to release the water.
Tip: Don’t forget to flush all toilets to empty their tanks.
Verify the Drain
Wait until the water stops dripping from the lowest faucet in the house. Place a bucket under the specific pipe section you intend to repair to catch any residual water.
Handling Specific Fixtures and Appliances
General pipe draining clears the supply lines, but appliances and fixtures hold their own reservoirs of water. Ignoring these specific areas can cause unexpected leaks when you disconnect components. You need to address toilets, showers, and hose bibs individually.
Emptying Toilet Tanks and Bowls
Flushing the toilet removes most of the water, but a significant amount remains in the bottom of the tank and bowl. This residual water will spill onto your floor if you need to remove the toilet for a repair. You can remove this remaining liquid using a heavy-duty sponge or a wet-dry vacuum.
Soak up the water with the sponge and ring it out into a bucket until the porcelain is dry. If you use a shop vacuum, make sure you remove the internal paper filter first to prevent ruining it. This step keeps your workspace clean and prevents sewage gases from escaping the drain temporarily.
Managing Exterior Hose Bibs
Exterior spigots, also known as hose bibs or sill cocks, are notorious for trapping water that leads to freezing. Even when you drain the main house, water can sit in the horizontal pipe leading outside. You should disconnect any garden hoses attached to the spigot to allow trapped water to escape.
Some homes have dedicated isolation valves for outdoor lines located inside the basement. Close these interior valves and open the exterior spigot to bleed the line completely. This is critical if you are repairing the spigot itself or winterizing the property.
Warning: Never leave a garden hose attached to an outdoor faucet during freezing weather. The trapped water will expand and burst the pipe inside your wall.
Dealing with Trapped Water in Low Spots
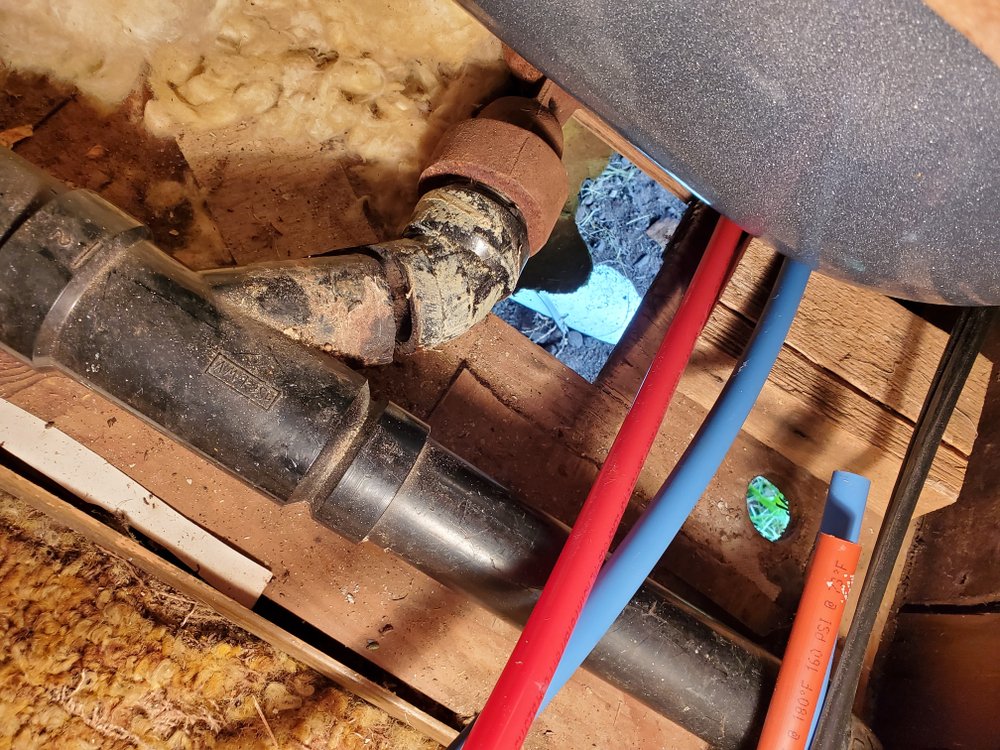
Plumbing systems often contain dips or “bellies” in the piping that gravity cannot drain naturally. These low spots hold water even after you have opened every faucet in the house. You will usually discover these pockets only when you cut into the pipe with a saw or cutter.
Always keep a shallow bucket and several rags nearby when cutting into existing plumbing lines. Cut slowly and be ready to catch the initial surge of water that escapes the cut. If the pipe is in a tight spot, you can use a small cup or a specialized pig-mat to absorb the spill. In some cases, issues caused by these low spots are best handled by professionals offering drain cleaning in Montgomery County, especially when trapped water and buildup make DIY solutions risky.
Professionals sometimes use an air compressor to blow out difficult lines, but this carries risks for old plumbing. High pressure can damage weak joints or blow debris into sensitive fixture valves. Stick to gravity draining unless you have specific equipment and training for pneumatic clearing.
Refilling the System Safely
Turning the water back on requires as much care as turning it off to avoid damaging your plumbing. Rushing this process can cause “water hammer,” a shockwave that bangs pipes and damages fittings. You must reintroduce water slowly to displace the air you let in earlier.
Close all the faucets you opened previously, but leave the highest faucet (usually a bathtub) slightly open. Go back to the main shut-off valve and open it very slowly, allowing water to fill the pipes gradually. You will hear air hissing out of the open faucet upstairs as the water rises.
Once water flows steadily from that top faucet without sputtering, you can close it. Then, go room by room and open each faucet briefly to bleed out any remaining trapped air. This method protects your system from pressure spikes and allows a smooth return to normal operation.
Key Takeaways:
- Disconnect hoses from exterior spigots to prevent freezing.
- Expect residual water in low pipe sections even after draining.
- Turn the main water valve back on slowly to prevent a water hammer.
Dripping-Dry: Plumbing Prep FAQs
Q: Why isn’t turning off the main water valve enough to start a repair?
Shutting the valve stops new water from entering, but gravity and air pressure keep residual water trapped in your pipes. You must drain the lines to create a dry workspace, as even a small drip can ruin solder joints or prevent PVC glue from bonding.
Q: Should I open the highest or lowest faucet in the house first?
Always open the highest faucets first to break the vacuum seal and introduce air into the system. This allows the remaining water to flow freely toward the lowest fixtures in your home, clearing the lines much faster.
Q: Do I really need to turn off my water heater before draining pipes?
Yes, you must turn off the electricity or set the gas to “Pilot” immediately. If the water level drops and the heating elements or burners kick on in an empty tank, they can burn out or damage the unit instantly.
Q: How do I deal with water that is still trapped in the pipes after draining?
Gravity cannot remove water from “low spots” or dips in your piping, so always keep a bucket and rags ready when making your first cut. For fixtures like toilets, use a heavy-duty sponge or wet-dry vacuum to remove the remaining water from the basin.
Q: What is the safest way to turn the water back on after a repair?
To avoid “water hammer” and pipe damage, close all fixtures except the highest one and open the main valve very slowly. Once water flows steadily without sputtering from that top faucet, you can turn it off and bleed the air from the rest of the house.
Why Proper Pipe Draining Makes All the Difference
Draining your pipes correctly is a fundamental skill that separates successful repairs from watery disasters. It gives you the dry environment needed for soldering, gluing, and fitting new components securely. Taking the time to locate valves, break vacuums, and manage specific fixtures protects your home from unnecessary water damage.
Remember that patience is your best tool during this process, both when draining and refilling the system. Rushing through the steps often results in trapped water or shocked pipes that create new leaks. By following this structured approach, you maintain control over your plumbing system throughout the entire repair project. If you’d rather leave it to a professional, Contact Apex Drain today for expert plumbing help that avoids costly mistakes and protects your system.